
一、Hexo 相关知识点
静态博客简单,但是发布博文时稍显麻烦,一般需要下面两步:
hexo clean |
如果考虑到同步源文件,还需要每次更改后,将源文件 push 到指定仓库:
git push origin master |
我们可以将 Hexo 文件分为两类,一类是源文件,即下面这些文件:
. |
一类是 public 文件,即网站文件:
public |
发布博文的这三个操作代表:
- hexo clean:删除网站(public)文件
- hexo g:生成网站(public)文件
- hexo d:将本地网站(public)文件同步到指定仓库(如:yourname.github.io)中
我使用一个私有仓库存放 Hexo 源文件,在 deppwang/deppwang.github.io 中存放网站文件。所以每次发布或者更新博文时,需要使用 push 操作更新源文件,再执行 hexo clean、hexo g -d 更新博客,比较麻烦。
所以我们希望能在 push 源文件后,由 CI/CD(持续集成 / 持续部署)工具为我们执行 hexo clean、hexo g -d 这两个操作。

二、GitHub Actions
CI/CD 工具前有 Travis CI,现有 GitHub Actions,这里使用 GitHub Actions。
GitHub Actions 的工作原理:我们提前设置好需要自动化执行的任务,GitHub Actions 监控当前仓库的某一个操作(如:push),一旦有此操作,就自动化执行这些任务。
所以我们希望使用 GitHub Actions 后,只需要往源文件仓库 push 更新源文件,GitHub Actions 监控到 push 操作时,就自动化执行 hexo clean、hexo g -d 操作,完成博文发布。
Action 存放在项目根目录的 .github/workflows 下,后缀为 .yml。一个 Action 相当于一个工作流 workflow,一个工作流可以有多个任务 job,每个任务可以分为几步 step。任务、步骤依次执行。
每个 Action 是一个独立脚本,所以可以作为代码仓库。
actions/setup-node就表示github.com/actions/setup-node这个 仓库,代表安装 node.js。Action 为 action.yml
可以通过下面这种格式来使用别人写好的 action,@借用了指针的概念:
actions/setup-node@74bc508 # 指向一个 commit |
关于 GitHub Actions 更多知识,请看 GitHub Actions 入门教程 - 阮一峰。
现在需要实现一个 Action,使其能够执行 hexo clean、hexo g -d 操作。

三、Hexo Action
我是使用的 sma11black 已经开发好的 Hexo Action,这个 Action 针对的是存放 Hexo 源文件和网站文件分开存放的场景。请先看 教程,以下为教程的补充。
非第一次生成 SSH Key:
ssh-keygen -t rsa -f ~/.ssh/id_rsa_x -C "[email protected]" |
将生成的 private key 作为 Hexo 源文件仓库 Settings > Secrets 的 一个名叫 DEPLOY_KEY 的 Secret。注意:需要复制包括 -----BEGIN OPENSSH PRIVATE KEY----- 和 -----END OPENSSH PRIVATE KEY----- 的整个内容。Secret 相当于一个变量,可以使私有变量不公开。
将生成的 public key 作为网站文件仓库 Settings > Deploy Keys 的 Deploy Key。Deploy Keys 中的公钥针对于当前仓库。
为什么要用 SSH Key?
SSH Key,是一对密匙:公钥 + 私钥,用于加密本地仓库和远程仓库的传输内容。
在 RSA 加密算法中,公钥用于对数据进行加密,私钥用于对数据进行解密
在 RSA 签名算法中,私钥用于对数据进行签名,公钥用于对签名进行验证。pull 的时候公钥用于对数据进行加密,私钥用于对数据进行解密,
push 的时候私钥用于对数据进行签名,公钥用于对签名进行验证。使用 GitHub Actions 是借助 GitHub 提供的环境,跟本地环境一样,也需要有私钥。当 GitHub Action 执行
hexo g -d时,是一个 push 的过程,用私钥 DEPLOY_KEY 签名,GitHub 用网站文件仓库的公钥 Deploy Key 进行验证。
下面是具体的 action.yml:
name: Deploy # workflow name |
四、运行过程
1、 Build deppwang/hexo-action@master(新建 hexo-action Docker 容器)
## action.yml |
# Dockerfile |
# Run Log |
2、Check Out(下载代码存放在容器中)
- name: Checkout # step1 获取 hexo 网站源码 |
# Run Log |
3、Cache node modules(解压 node_modules 压缩包)
# Caching dependencies to speed up workflows. (GitHub will remove any cache entries that have not been accessed in over 7 days.) 根据 package-lock.json 压缩缓存 node_modules,不用每次下载,使用时解压,可以加快工作流的执行过程,超过 7 天没有使用将删除压缩包。 |
# Run Log |
4、 Install Dependencies(如有必要,更新 node_modules)
- name: Install Dependencies # step3 |
5、Deploy(生成、发布博文)
- hexo g 生成 public 网站静态文件
- hexo d 将静态文件 push 到指定仓库(会强制覆盖原文件,如何不覆盖源文件呢?)
- name: Deploy # step4 |
!/bin/sh |
五、可能出现的问题:Deploy 失败
可能出现以下 3 三种情况:
1、

重点:
Host key verification failed |
原因:站点配置文件 配置项 deploy 存在出 GitHub 以外的仓库 — 如:Coding ,而 Hexo-Action 不能识别此仓库
解决方式:
- 要么去除 GitHub 以外的仓库;
- 要么 *entrypoint.sh * 添加
ssh-keyscan -t rsa e.coding.net >> /root/.ssh/known_hosts
2、
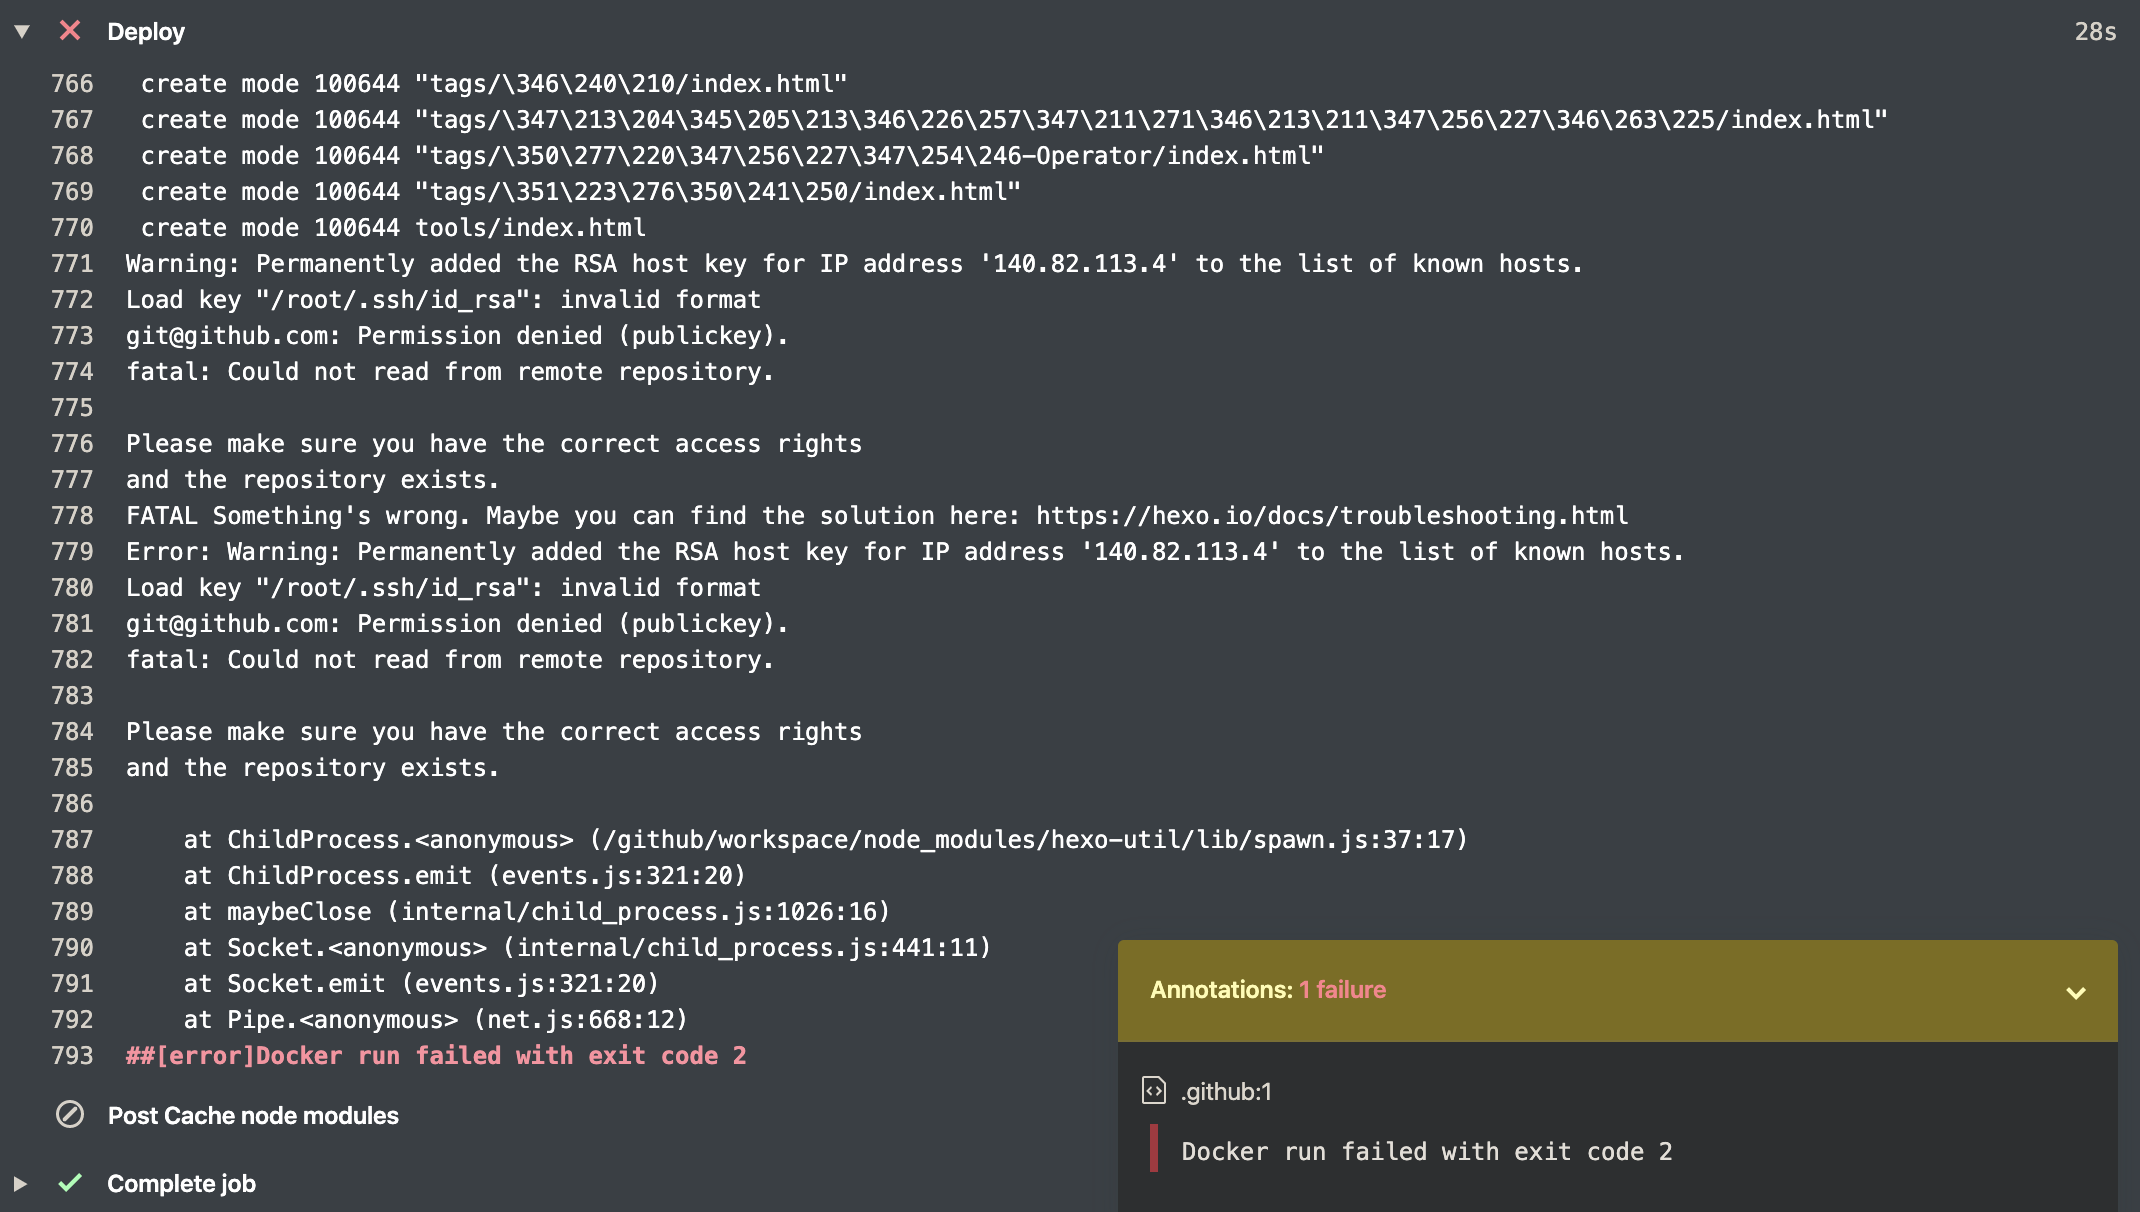
重点:
Load key "/root/ssh/id_rsa": invalid format |
原因:SSH Key 的公钥和私钥没有正确复制,或者设置错误
解决方式:正确且完整的复制并设置
3、
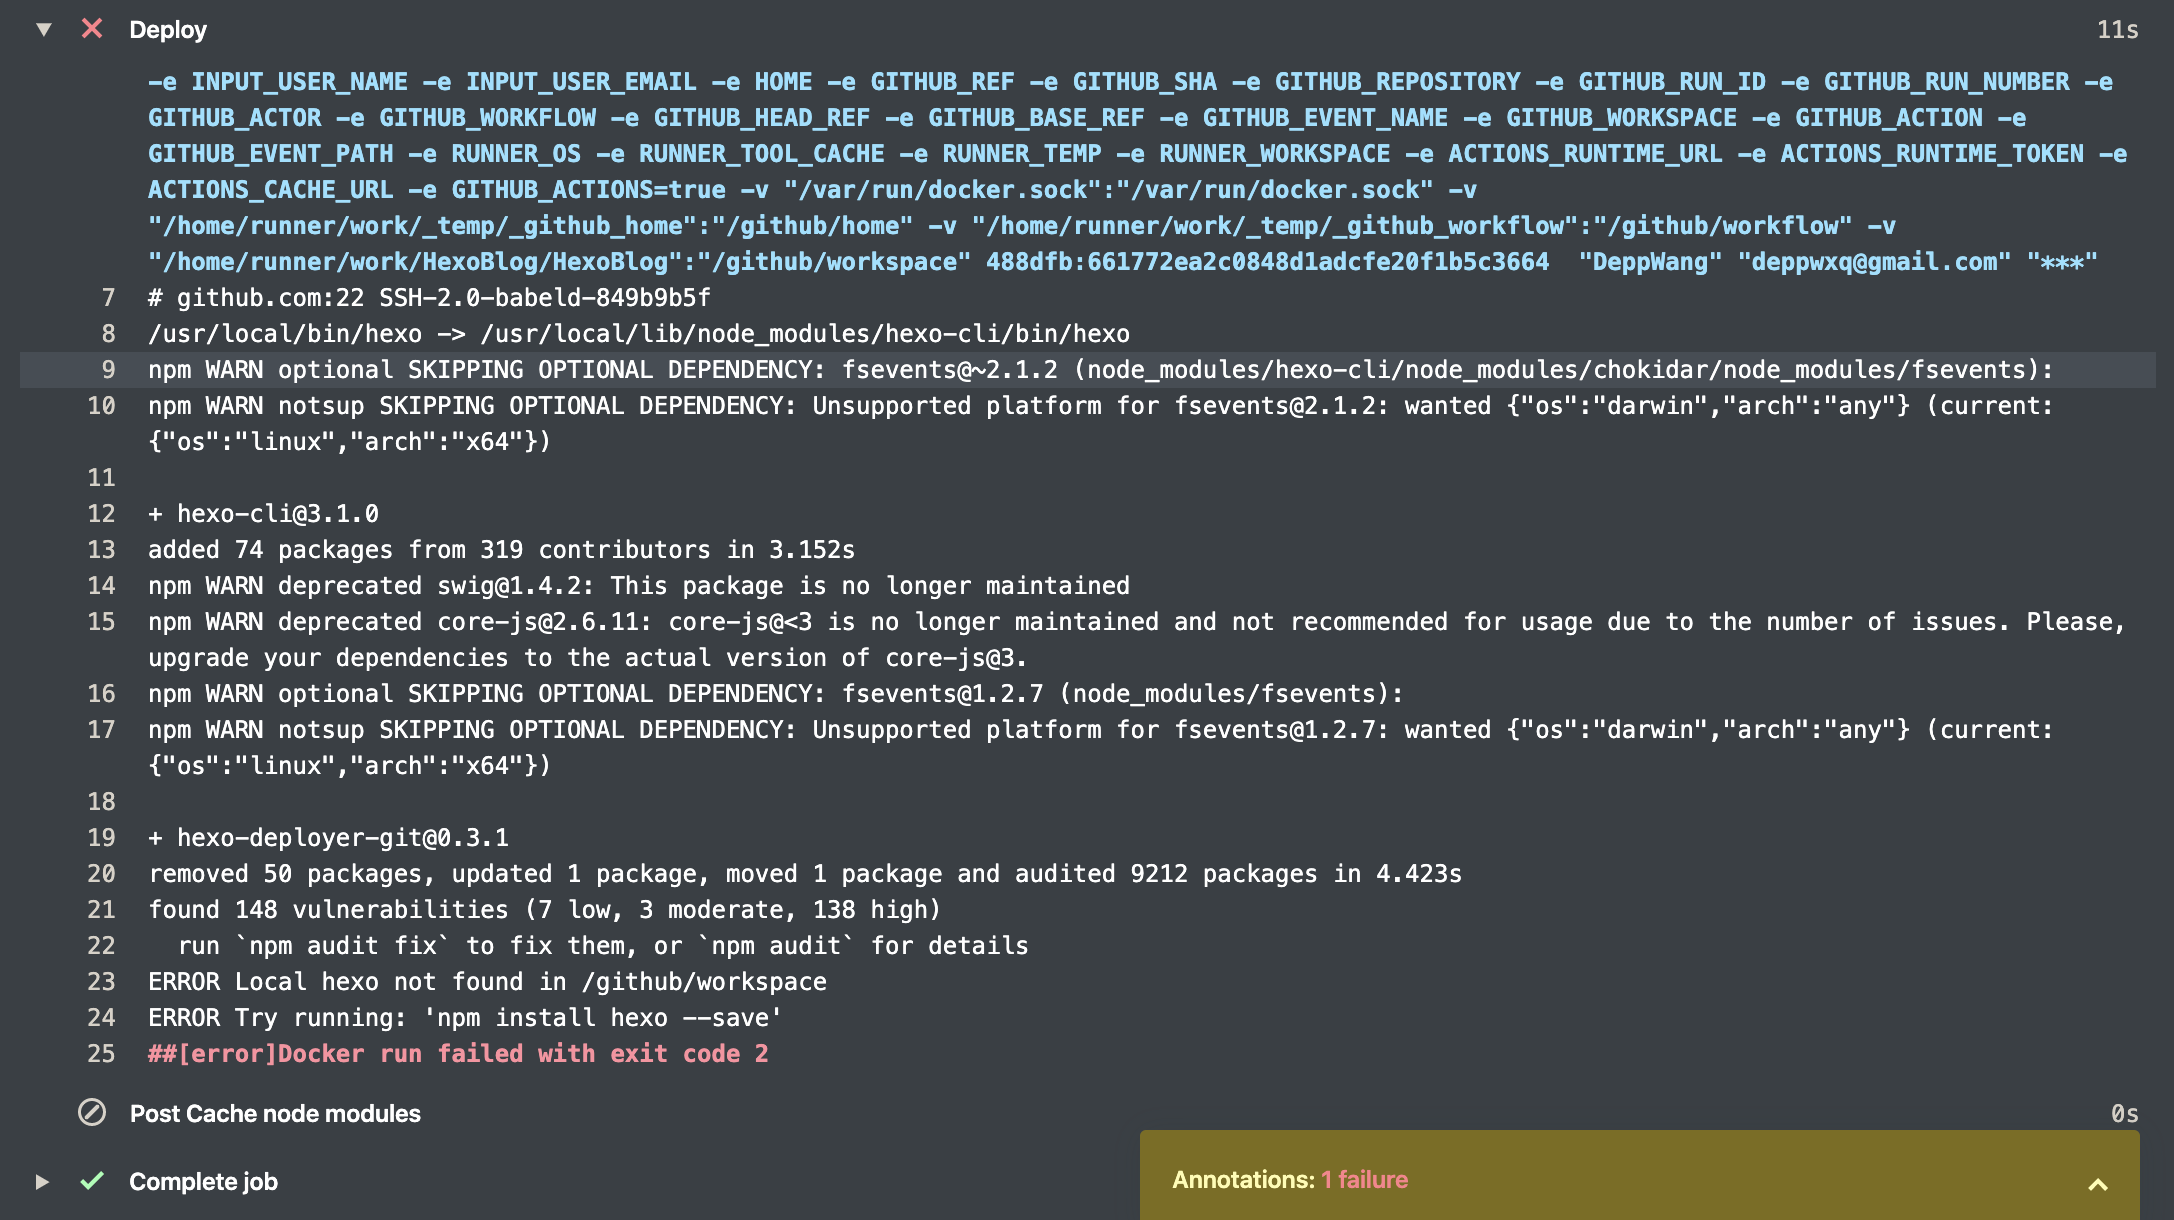
重点:
ERROR Local hexo not found in /github/workspace |
原因:hexo-deployer-git 的版本过低,导致删除了 hexo 包。
解决方式:
- 参考 此 issue 升级
hexo-deployer-git - 使用
deppwang/[email protected]重装,他重新安装了 hexo 包
六、解决 **.github.io 丢失 commit 记录
hexo d 其实分为 3 步:
- 将 public 文件复制到 .deploy_git
- commit
- push 到远程仓库
执行 hexo d 命令时,如果没有 .doploy_git 文件,它将新建一个 .deploy_git 文件,所以旧的 commit 记录将丢失。
可以在 entrypoint.sh 中添加一行命令来解决这个问题:
git clone https://github.com/username/username.github.io.git .deploy_git |